 An official website of the United States government.
.")
It might feel like you need to brace yourself for the slew of purchases (and waste) that can come along with heading back to school. From new pencils to new lunchboxes, the list just seems to get longer each year. Not to mention trying to keep up with the stacks of old summer-camp t-shirts in the closet! Fortunately, there are a few ways you can re-purpose those too-small t-shirts into sustainable items that keep the planet thriving. So grab your scissors and your old t-shirts and get ready to get back to school waste-free!
Supplies:
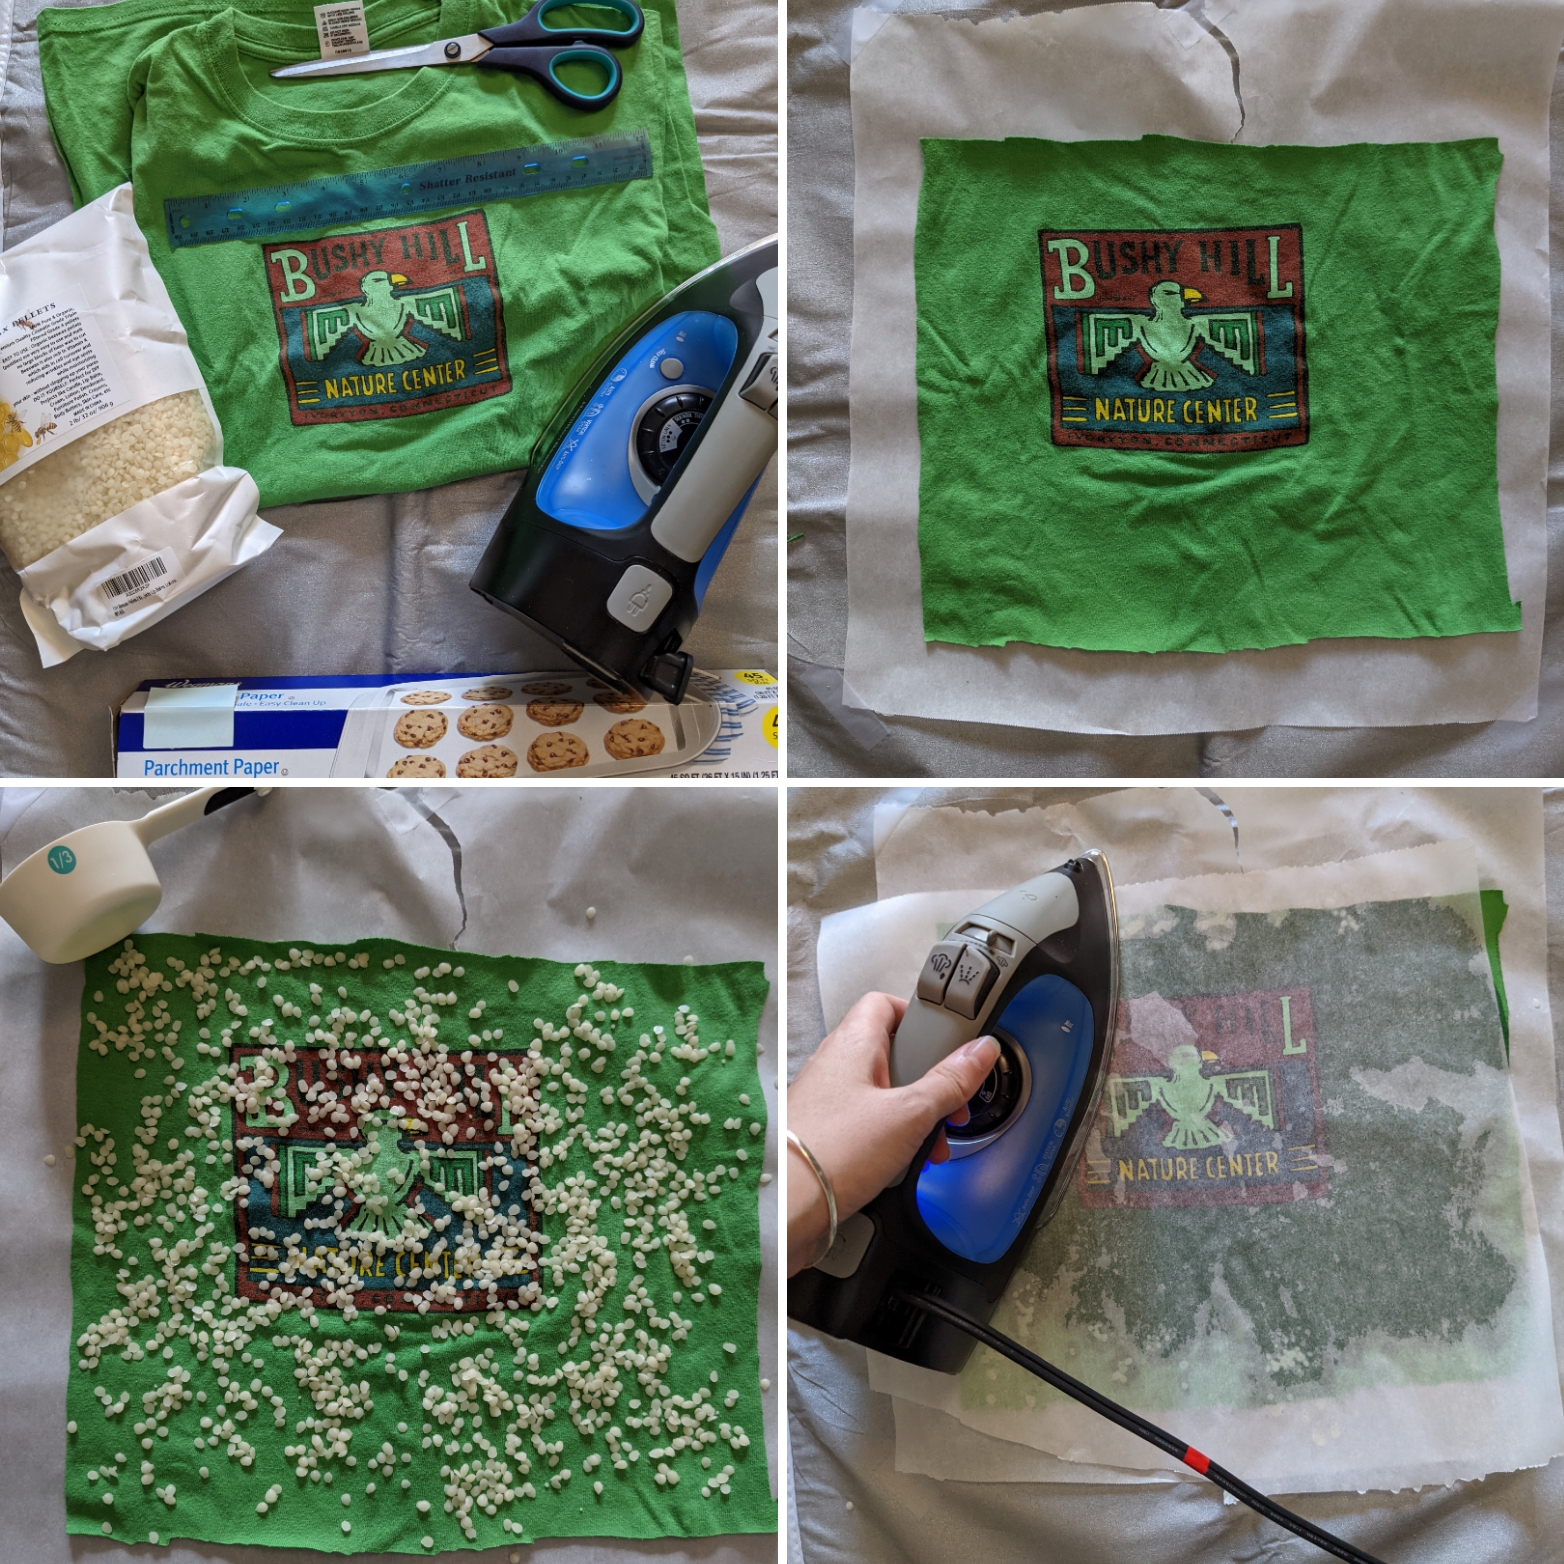
- Clean t-shirt
- Scissors (pinking shears or zig-zag scissors might work better to prevent fraying)
- Iron & ironing board (ensure there are adults or older students available to monitor safety)
- Beeswax pellets (available at most craft stores or online)
- Ruler (optional)
Steps:
- Lay your t-shirt out flat and cut out a 11x11-inch square. (Any size square will work, but these measurements are a good fit for most bowls or snack items.)
- Place your square of fabric over a piece of parchment paper on your ironing board.
- Scatter beeswax pellets across your fabric (1/3 cup should be enough for an 11x11 square).
- Place another piece of parchment over top of the beeswax. (This is important to protect your iron!)
- Iron out your fabric wrap, ensuring the wax melts evenly across the square. If you have globs of wax in some areas, place another piece of fabric over top to soak some up.
- Remove the parchment paper and hang up your wax wrap to dry.
- Say goodbye to your plastic wrap and enjoy your low-waste lunch!
Want to turn this into an engineering and design exercise? Check out this standards-aligned lesson plan from Hawaiʻi Sea Grant.